-
Why a Checklist Instead of “Just Be Careful”
-
Step 1: Confirm the Chain Series — and Question “Heavy Duty”
-
Step 2: Put the Attachment Interval in the PO
-
Step 3: Tsubaki Zip Chain Lifter — Measure the Mounting Envelope
-
Step 4: Flexible Shaft Coupling — Bore Size Is Only Half the Spec
-
Step 5: 24V Linear Actuator — Check the Duty Cycle, Not Just the Force
-
Step 6: Which Is Better — Ball Bearing or Roller Bearing?
-
Step 7: Get a Second Signature
-
Step 8: Keep Your Own Spec Sheet
-
Common Mistakes I Still See
-
A Final Word
Why a Checklist Instead of “Just Be Careful”
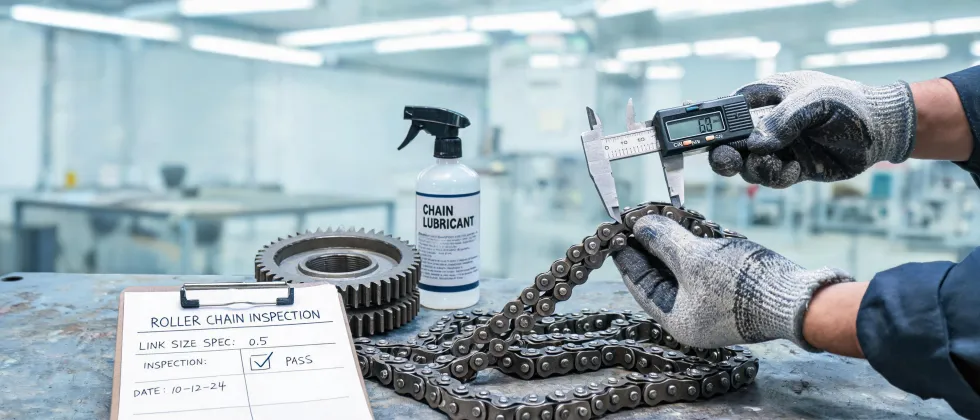
In my first year, I thought “being careful” was enough. I didn't need a formal process — I'd double-check everything myself. Then, in September 2022, I approved a $3,200 order of chain without verifying the attachment spacing. It looked fine on my screen. I checked it, approved it, processed it. We caught the error at installation when an attachment didn't line up with the conveyor flight. That chain was technically correct and entirely useless for our machine.
Five minutes of verification beats five days of correction.
That's the rule I've operated on ever since. This checklist is the result. It's not for design engineers calculating complex loads all day. It's for the rest of us — the ones who have to order a replacement part, verify it's right, and keep the line running.
One caveat before I start: my experience is with roller chain, leaf chain, couplings, and linear actuators. I don't have much hands-on time with Tsubaki's timing belts or motorcycle chain lines. If you're working with those, some of these steps still apply, but your specifics might differ.
Step 1: Confirm the Chain Series — and Question “Heavy Duty”
The first mistake I made was ordering “RS60-H” because I assumed the heavy-duty version was always better. It's Tsubaki's heavy series: same pitch, same roller diameter, but thicker link plates. What I didn't check was whether our conveyor rail channel had clearance for those thicker plates. It didn't. $780 of chain that should've been simple, plus a four-day return-and-reorder cycle.
The lesson: when you're ordering tsubaki-chain products, the “H” series exists for a reason — but “heavier” doesn't mean “retrofit-friendly.” Now I search for “chain tsubaki” in the product PDFs before I trust a distributor's word, and I always note the suffix on my PO. RS60 and RS60-H are different items. A distributor won't always ask which one you actually need. Per ISO 606 and ANSI B29.1, the H-series shares the same pitch and roller dimensions as standard series, but the plate dimensions are larger — which is exactly why clearance matters.
Checklist item: verify the chain series suffix (H, S, or none) against the sprockets and rail clearance you already have installed.
Step 2: Put the Attachment Interval in the PO
That September 2022 order I mentioned — the $3,200 one — was K1 attachment roller chain. I specified “attachment every fifth link” in a passing email, but the PO just said “with K1 attachments.” The supplier shipped one attachment per link, which is the standard interpretation. Our conveyor needed one every five links. The whole batch was useless.
I want to say we tried to return it, but we'd signed the delivery receipt, and the stock sat in a bin for nearly a year before we scrapped it.
Checklist item: write the attachment interval directly on the PO. Don't rely on email threads. And if you have the old chain, count the links between attachments and write that number down. It takes two minutes.
Step 3: Tsubaki Zip Chain Lifter — Measure the Mounting Envelope
The Tsubaki zip chain lifter is a compact chain-based lifting mechanism. Sounds simple. But it has far more configuration variables than you'd expect: lift height, chain size, motor location, mounting orientation.
My mistake was ordering a lifter without checking the motor position against our machine frame. I got the lift height right, the chain size right, everything on paper right. The motor housing arrived exactly where a support bracket sits on our frame. $900 of hardware, and we had to fabricate an adapter plate and re-route some wiring to make it fit. (Should mention: the plate cost us $140 and two days. The embarrassment was free.)
Checklist item: for any zip chain lifter order, confirm the motor orientation and measure the physical envelope — all three axes — before submitting. If you're replacing an existing unit, take a nameplate photo. If the clearance doesn't match the photos, you don't have the right part.
Step 4: Flexible Shaft Coupling — Bore Size Is Only Half the Spec
Flexible shaft couplings seem easy: match the bores, pick a coupling, bolt it on. I learned the hard way that the bore diameter is only half the story.
The order looked right: ½" bore on the motor side, ⅝" on the pump side. What I missed was the keyway width. The motor shaft had a 3/16" keyway; the coupling hub was cut for a 5/32" key. Same bore diameter, wrong keyway. The key would have wobbled loose within a few hours of runtime. We caught it before install, so I didn't burn the coupling cost — but the two-day delay on the machine handover still stung.
Checklist item: verify the bore diameter and the keyway size on both shafts. Tsubaki's coupling selection guide includes keyway specs right in the part number — worth learning how to read them.
Step 5: 24V Linear Actuator — Check the Duty Cycle, Not Just the Force
I've ordered exactly one 24v linear actuator where the failure was entirely my fault. We needed to lift a 35-pound guard door about 12 inches. I checked the force rating (100 lbs — plenty), checked the stroke (18 inches — fine), checked the mounting style (clevis, good). I did not check the duty cycle.
The actuator was rated for 25% duty. Our application ran closer to 60%. Twenty minutes into cycle testing, the thermal breaker tripped. It kept tripping, and I stood there convinced the unit was defective. It wasn't. It was underspecified.
Hmm, and I should add this: the datasheet recommended “50% duty or higher for continuous applications,” and I'd read that line. I just skipped over it because I was fixated on force and stroke.
Checklist item: for any 24V linear actuator, confirm the duty cycle percentage and cycles per minute against your actual application. If your duty exceeds the actuator's rating, size up or choose a different motor duty. Force rating alone is a trap.
Step 6: Which Is Better — Ball Bearing or Roller Bearing?
Every few months, a newer engineer asks me which is better ball bearing or roller bearing. It's not quite the right question, but I get why they ask. They want a decision rule.
Here's the decision rule I use. Ball bearings handle moderate radial loads plus axial loads, and they tolerate higher speeds. Roller bearings handle heavier radial loads and shock loads, because line contact spreads the load over a larger area. Center-of-the-road applications get ball bearings. Heavy rotating shafts — conveyor head shafts, gearbox output shafts — get roller bearings.
I substituted a ball bearing for a roller bearing once, because the shaft diameter matched and the part was sitting in stock. It ran four months before the noise started. By the time we shut down for replacement, the race had spalled badly enough that we had to polish the shaft journal. $1,400 in parts and downtime. I saved about three days of lead time.
Checklist item: if the original spec calls for a roller bearing, replace it with a roller bearing. And if you're designing something new, calculate the equivalent radial load and check it against both bearing types before you choose. The ratings are in the catalog; you just need to read the right column.
Step 7: Get a Second Signature
This step came after mistake number three. I realized my own double-checking wasn't enough. I have blind spots — I see what I expect to see. So we added a rule: any order for chain, chain-related components, or motion control products needs two signatures. The engineer who specs it, plus a second engineer or senior tech who reviews it against the current installation.
It's annoying. It takes ten minutes. It has caught 47 potential errors in 18 months. Six of those would have been expensive. The coupling keyway from Step 4 is one of them — it doesn't get caught when only one person is looking.
If you don't have a second person on site, the principle still works: sleep on it. Review the order the next morning with fresh eyes. Or ask the distributor's application engineer to review the part numbers. The terms won't say it includes an engineering check — (should mention: I've learned it's worth asking for it anyway).
Step 8: Keep Your Own Spec Sheet
The last engineer at this plant kept a one-page spec sheet for every machine: chain numbers, attachment spacing, bore sizes, keyways, stroke lengths, serial numbers. I ignored it when I started. Learned the hard way. Then I started my own.
It's not about trusting your memory. It's about giving the next person a reference they'll actually find. Next time you order a replacement coupling, you won't have to re-measure the shaft. It's already on the sheet.
Checklist item: if you don't have spec sheets for your machines, start one this week. One page per machine. Fifteen minutes of work saves an afternoon of measurement — and it catches discrepancies before you order, not after.
Common Mistakes I Still See
Even with the checklist, these patterns keep showing up on orders that cross my desk:
- Assuming “same model number” across revision years means the same product. Manufacturers revise chains and actuators. If your part was installed in 2016, verify the current part number in the current catalog.
- Ignoring lead times. Tsubaki lead times shifted on us once, and we paid a rush fee because a distributor gave us an optimistic “verified” number. Now we request lead time in writing.
- Ordering the “obvious upgrade” without confirming compatibility. See Step 1. An upgrade is only an upgrade if it fits what's already bolted down.
A Final Word
My experience is based on roughly 200 orders over eight years, mostly mid-range industrial component purchases. If you're working in a heavier or lighter duty class than I do, your mileage may vary.
Oh, and one more thing: the “47 errors caught” figure I keep quoting — I'm fairly confident about that number, but the full spreadsheet is at work, and I'm writing this from memory. Don't quote me on the exact figure.
But the principle holds whether you're ordering chains, lifters, couplings, or actuators: five minutes of verification beats five days of correction. I've got the receipts to prove it.