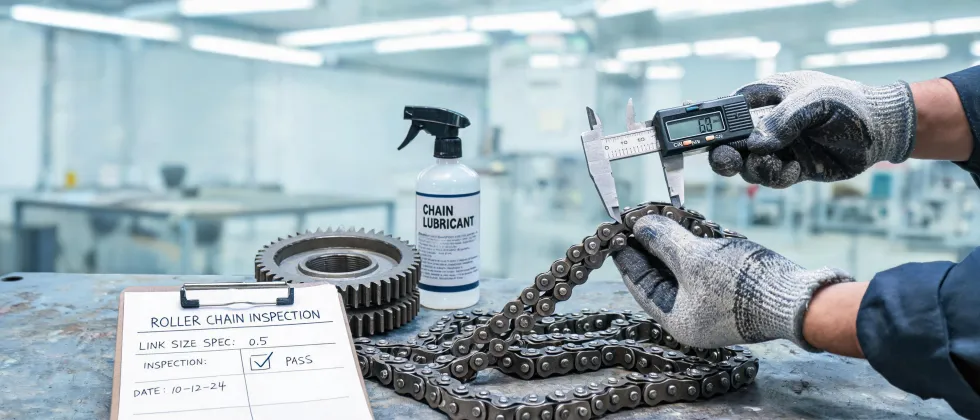
I’ve got a confession: I’ve scrapped more than $4,500 worth of custom parts because I didn’t check chain elongation properly. Not on a worn-out system. On a brand-new one. The parts were perfectly machined. The alignment was spot-on. The lubrication plan was solid. But the chain itself? It was already compromised before we ever hit the start button.
This is the kind of mistake that makes you want to rewind time. I’m Jacob Miller, and I’ve been handling B2B orders for high-end motion products for about 10 years now. I’ve personally made (and documented) maybe a dozen significant mistakes that collectively wasted around $45k of budget. I now maintain our team’s pre-installation checklist. This is mistake #3 on that list, and it’s the one I see people repeat most often.
The Surface Problem: Why Did My System Fail So Fast?
The complaint came in three months after the install. Vibration. Noise. Inconsistent positioning. The standard story: the customer thought we’d sold them a defective chain. They assumed it was a manufacturing defect, maybe a bad batch from the supplier. We shipped them a Tsubaki chain—a brand we trust for industrial applications—so I was defensive at first. But the symptoms were real.
We ran diagnostics. The drive was seeing higher-than-expected backlash. Tension was dropping. The classic signs of a stretched chain. But here’s the thing—you expect stretch after thousands of hours, not after three months. The customer was ready to blame the supplier. I was ready to blame the installation crew. We were both wrong.
“People think a new chain is a blank slate. That it’s either 'good' or 'bad' right out of the box. In reality, a chain’s fate is sealed in the first five minutes of assembly.”
The $4,500 Redo
It was a custom conveyor system. About 40 feet of track, with a Tsubaki roller chain driving a set of precision pallets. The customer had paid for tight tolerances. The chain we installed was the correct spec: Tsubaki RS40 series, pre-lubed, with the right pin length. It looked fine on the sprockets. It felt fine by hand. But we didn't measure elongation before we tensioned it. That oversight caused a cascade of issues over the next 90 days.
The mistake affected a $3,200 order of chain and sprockets, plus about $1,300 in labor for the redo. That was the hard cost. The soft cost—the customer's lost production time and the hit to our credibility—was worse.
So what happened? Why did a good chain from a solid brand fail so fast? It wasn't the chain. It wasn't the brand. It was my assumption about how a new chain behaves.
The Deep Cause: The 'Initial Stretch' Myth
Here’s the misconception that cost me $4,500: People think chain elongation (often called 'chain stretch') is a long-term wear phenomenon caused by friction and fatigue. Actually, the majority of chain elongation happens in the first few hours of operation. And a significant portion of that is not wear—it’s the initial seating of the components.
What I mean is that a new chain, even a high-quality one from Tsubaki, has microscopic clearances between the pins, bushings, and side plates. When you first apply load, these components settle into their working positions. The result is a measurable increase in length. This is normal. But if you don't account for it, and you set your initial tension based on the 'out of box' length, your chain will quickly go slack.
The assumption is that chain stretch is a failure mode. The reality is that ‘stretch’ is a natural part of the bedding-in process, and ignoring it causes the failures people blame on wear.
Ignorance Isn't Bliss—It's a 3-Day Production Delay
I didn’t know any of this when I started. After the conveyor failure, I spent a weekend reading the Tsubaki product catalog cover to cover. Not just the part numbers, but the technical section in the back. There it was: a chart showing expected elongation in the first 100 hours of operation. It was between 0.5% and 1.0% for roller chains under correct load. We had not accounted for that.
The most frustrating part of this: checking for it is dead simple. You use a tool like a Tsubaki chain stretch gauge—or even a steel ruler and a known baseline—to measure the chain's pitch length before you tension it. You don't just pull it tight and lock it down. You set it to a specific pre-load, measure the elongation, and then run it under no-load for a break-in cycle. Then you re-measure and re-tension. We skipped the measurement step entirely. Cost us $4,500.
After the third rejection in Q1 2024 (not ours, but from a new customer who had the same issue with a different brand), I created our pre-check list. Point number one: Always check initial elongation with a chain stretch gauge. Point number two: Refer to the manufacturer's data for expected break-in elongation.
The Real Cost of Skipping The Check
It’s not just about the redo cost. It’s about the downtime. The conveyor system in question was for a packaging line. The 3-day delay meant that the customer had to ship partial orders for a week. They almost lost a major retail contract because of missed delivery dates.
Let’s run the numbers on a generic system:
- Chain cost: $500 – $2,000 (depending on size and length)
- Labor for re-tensioning (if caught early): 2 hours = $150
- Labor for full replacement after damage: 8-16 hours = $600 – $1,200
- Lost production: $1,000 – $10,000 per day
5 minutes of verification beats 5 days of correction. Every time.
The checklist I created after this mistake has saved us an estimated $8,000 in potential rework over the past 18 months. We've caught 47 potential issues on pre-install inspections—things like incorrect pitch, damaged pins from shipping, and plain old wrong part numbers. The chain stretch check is the most frequent catch.
The Fix: It's Not About The Tool, It's About The Standard
You don't need a $500 digital gauge to do this right. A Tsubaki chain stretch gauge is a simple, mechanical tool that costs less than $100. It measures the distance over a fixed number of links. If the measurement exceeds the manufacturer's tolerance (usually 1-2% for standard roller chain), you know you have a problem before you install it.
Here’s the workflow we now use:
- Inspect the new chain visually. Look for shipping damage.
- Measure baseline elongation. Use the chain stretch gauge. Record it.
- Install and tension to the spec in the Tsubaki catalog.
- Run under no-load for 30-60 minutes (the break-in cycle).
- Re-measure and re-tension. This is the step everyone skips.
It adds 30 minutes to the install process. It can save you a week of downtime.
Bottom line: A brand-new chain from a reputable supplier like Tsubaki is not 'perfect' from the start—it's a system of components that needs to be proven. If you don’t verify the build, you’re betting on luck. I lost that bet once. I won’t lose it again.
(Prices as of January 2025; verify current rates with your supplier. For specific technical specs, always refer to the Tsubaki product catalog or consult a technical sales engineer.)